Most of the 12v dc and 230v ac bits and pieces are now on their way, so the install can start as and when I fancy it. But certainly not in this current heat…
There’s a couple of blue bits (Victron) coming – the XS 50a dc-dc charger, and a Smart Solar 50/100 MPPT controller, together with a Fogstar 50a mains charger, a 12-way fusebox, 300a isolator, and a few other odds and ends. I still need a few midi and mega fuses/holders, an ANL fuse and one or two other bits.
I think, though, that the next job should really be the side load door slider. This is a known corrosion point on these vans, and I can just make out a smidge of rust behind it.
The job entails removing it (a few nuts), de-scabbing it, treating, primering, topcoating, and replacing with plenty of Lanoguard or similar between it and the bodywork. Fortunately, that’s the only bit of corrosion I can find, so overall it’s not too bad. I assume moisture attacks the edges of the stud holes where they pierce the body panel – which to me points to a poor build process, which is a shame given that the body is galvanised and shouldn’t really present a problem if treated correctly at build. I guess water creeps down behind the slider, and then along the securing studs, meeting the hole edges, which probably get chafed of any paint protection as the studs are inserted. Maybe it hasn’t got any worse since we bought the van as I’ve pumped a fair bit of Duck Oil down there, which should help. We’ll see soon enough…
Hopefully it’s not too bad, and anyway, the only tiny bit that could possibly be visible will eventually be vinyl wrapped.
–
Cooler weather at last, so time to pull the sliding door runner off to see what horrors lie beneath (they all rust there, sir…).
Actually, after cleaning off the accumulated filth, it wasn’t too bad. Well, better than many I’ve seen documented on Facebook etc.
Aside from the visible scabby little bit near the front, and the patch of hidden stuff (normal from what I’ve seen elsewhere) and a few other tiny little crusts, it was remarkably clean, and only one mounting hole exhibited any (small) sign of surface rust.
These were all cleaned back past the good galvanised areas, treated with Fertan, and lightly coated with lanolin grease.
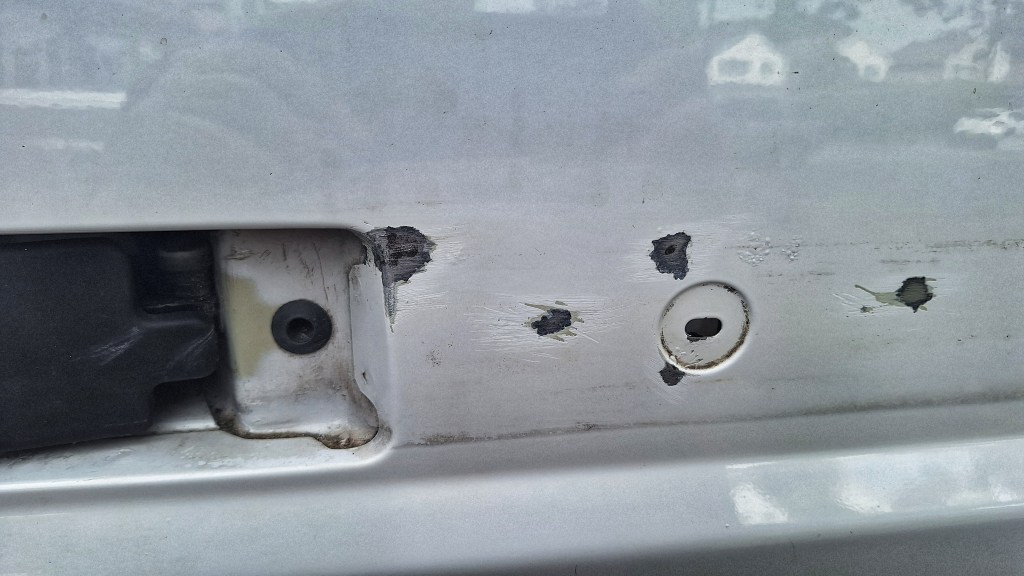
Front… (yes, the other little bubbly bit was done too, when I noticed it)
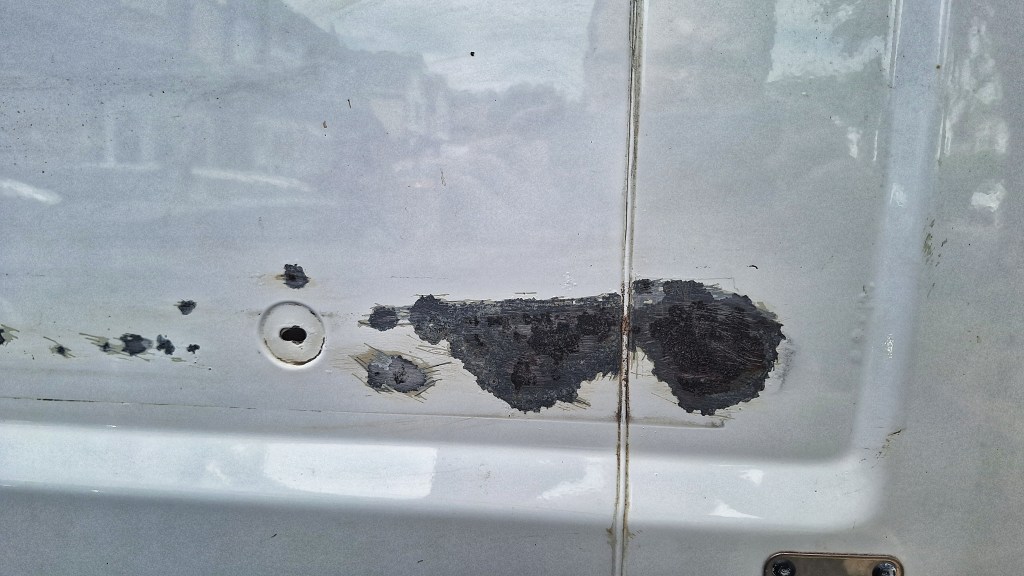
…and rear
Sikaflex 522 was then fairly liberally applied to all the mounting hole areas so it would squish through the holes, and a line of of it applied to the edges of the runner to prevent further water ingress. The M6 fixings were then tightened into place, and that should be that.
–
Spent a little time adding an L-section rubber trim to the front edge of the floor where it meets the cab floor. Fingers crossed that it sticks. I used Sikaflex 522 clear. Never used the clear version before, but I think it should be OK.
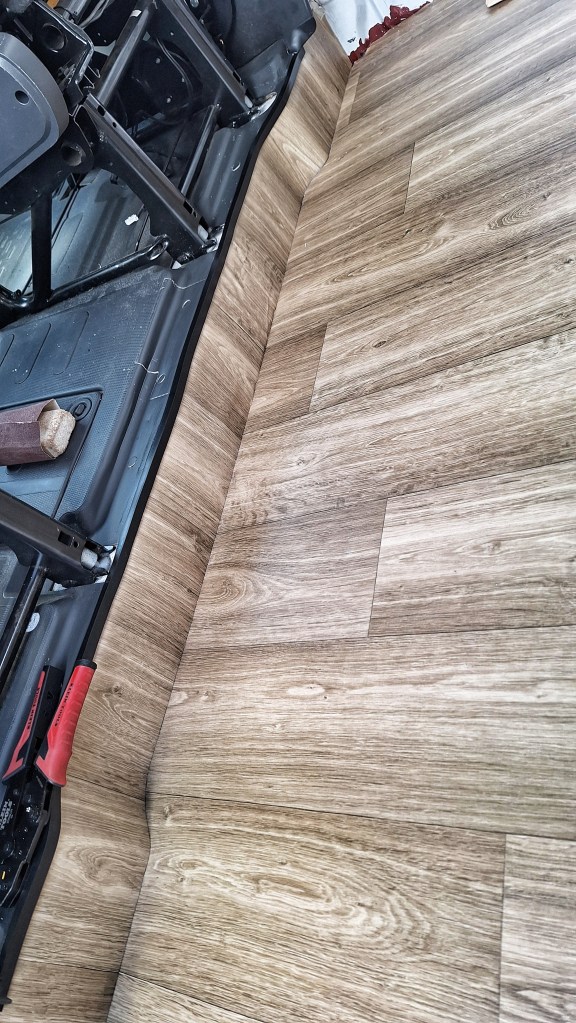
I’ll also run a bead of the 522 around all the floor edges, just to prevent any spills creeping under there.
I also installed a USB double socket on the passenger-side B-post, using a mount that I pulled out of the rear of the van (it had a 12v cig-lighter type of outlet in it originally, but the USB fits perfectly). It’ll be useful both with the seat facing forward or swivelled to the rear.
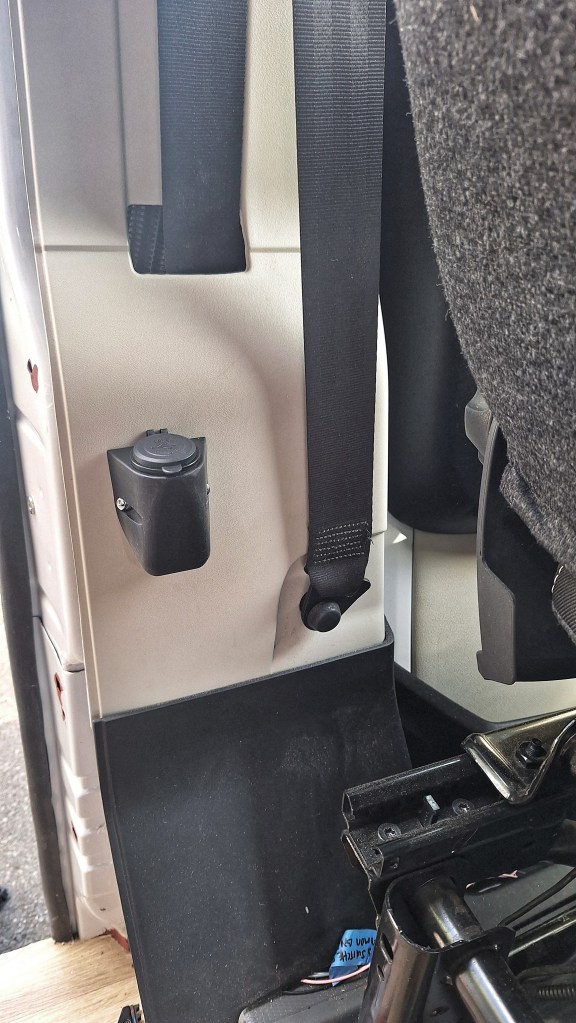
–
Still in the same area, the bulkhead lining is coming along.
The kit I bought is a bit ‘meh’ as I suspected it might be, but after a bit of modding, the top piece is ok/usable, but the uprights proved to be hopeless, so I re-made those.
They look fine now, but the gap between them and the original Fiat trim still needs filling before it can all be carpeted and called a ‘job done’.
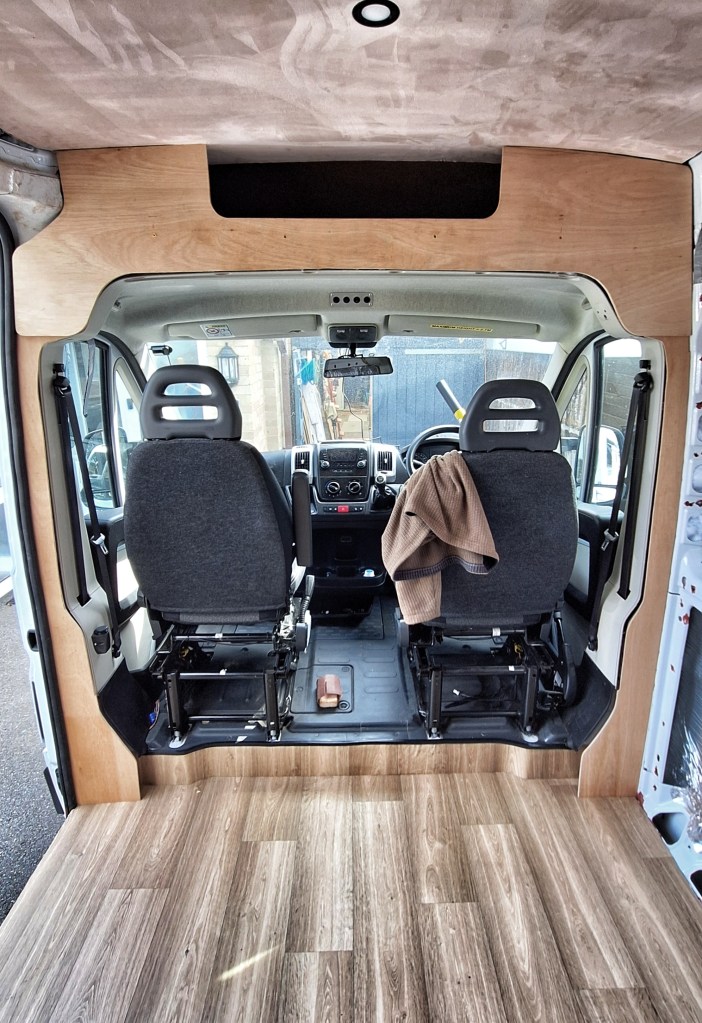
That gap is problematic, though.
M came up with the good idea of applying the same type of rubber ‘U’ channel (we have lots left) that we used for the rear doors’ trim, to the cab’s plastic trim so that the carpet can be tucked into it, creating a neat finish. However, we still need to find something to bridge the gap twixt ply panels and cab trim so that the carpet has something to lie against/adhere to – otherwise it’ll just get displaced way to easily. What to use, though, is the issue. The gap is far from consistent, ranging from about 25mm to 30mm in various places, so the use of timber is definitely out. A dense foam is a possibility, but we’re struggling as all that’s available online seems to be rather soft stuff, and wouldn’t really help much.
Thinking caps on.
I did make a start on the panelling above the sliding door, however. I used 3mm ply, cut to width with the track saw, and chamfered and screwed in place. I chose 3mm here as the front end of it has to bend somewhat where it meets the bulkhead top trim panel. Sadly, though, the amount of bend is a step too far, so I cut it a little shorter, and the resulting gap will have to be filled, creatively (no plan as yet!) before the carpeting stage.
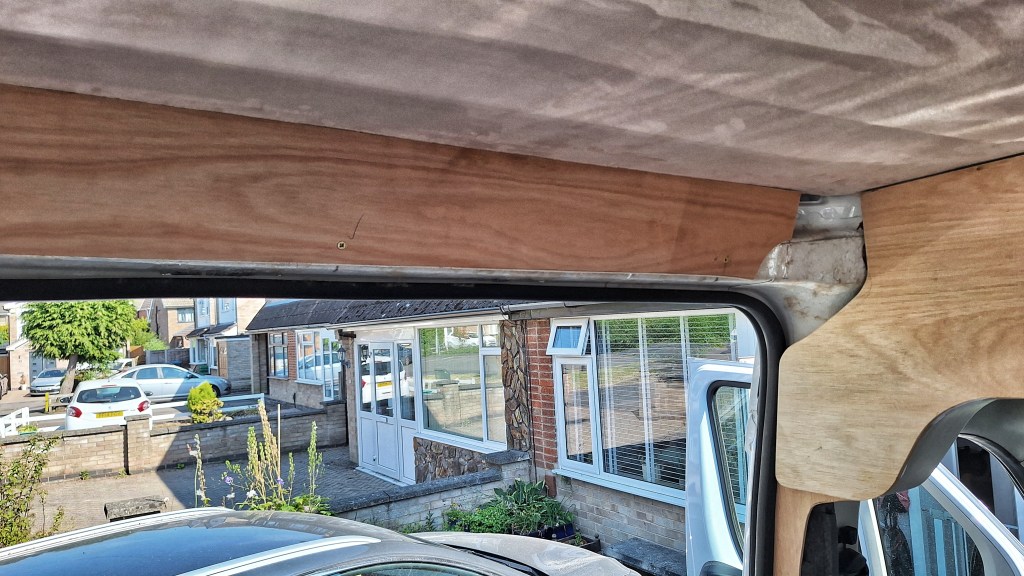
It’s still slightly curved at the front end, although this isn’t apparent in the photo.
–
Moving on from the bulkhead for a while, and the bed supports are now in situ.
I put in six M8 rivnuts on each side of the van, utilising holes already punched in the sheet metal. The planed timber supports were drilled through (clearance) and secured using stainless bolts and penny washers.
I don’t think they’re going anywhere.
The four Skorva beams will sit atop these. The rearmost one and the third one being secured down, via spacers, to the timber side supports, while the second and fourth (front) beams will be able to slide forward to extend the bed from four feet to six feet six inches long (ie giving a full king size bed when extended). Obviously the leading edge will need to be supported when extended. The offside will therefore sit on a cut-out section of the kitchen unit, while the nearside will, er, I haven’t worked that out quite yet, but I’ll get there.
It may not be obvious, but the rear and third Skorva beams will be joined with ply slats (18mm thick), and the second and front ones will likewise be connected with alternating slats. Air gaps between the ply slats will permit ventilation to the bottom of the mattress to prevent any chance of mould.
It’ll come clear in the photos of the finished article…
Got the ply slats machined by Harlow Timber. Sixteen slats, 3.5in wide, cut dead accurately and in a few minutes. Perfect! I was going to do it with the track saw, but sense prevailed, and the extra cost of the machining was well worth the cost – and I still have an approx 3ft x 4ft piece of ply left over which will probably be used elsewhere, maybe for the bedside infill panels.
I also made up sixteen mounting/slider blocks, for the Skorva beams, from phenolic ply (still recycling the stuff from the original van floor, and another piece awaits the electrical bits and pieces and mounting in the ‘garage’ by the nearside wheel well). These were double thickness, glued together with 522, and will be screwed under each end of the beams, and in the case of the fixed beams, screwed into the timber support beams (via the aluminium slides/guides). Again, see the photos!
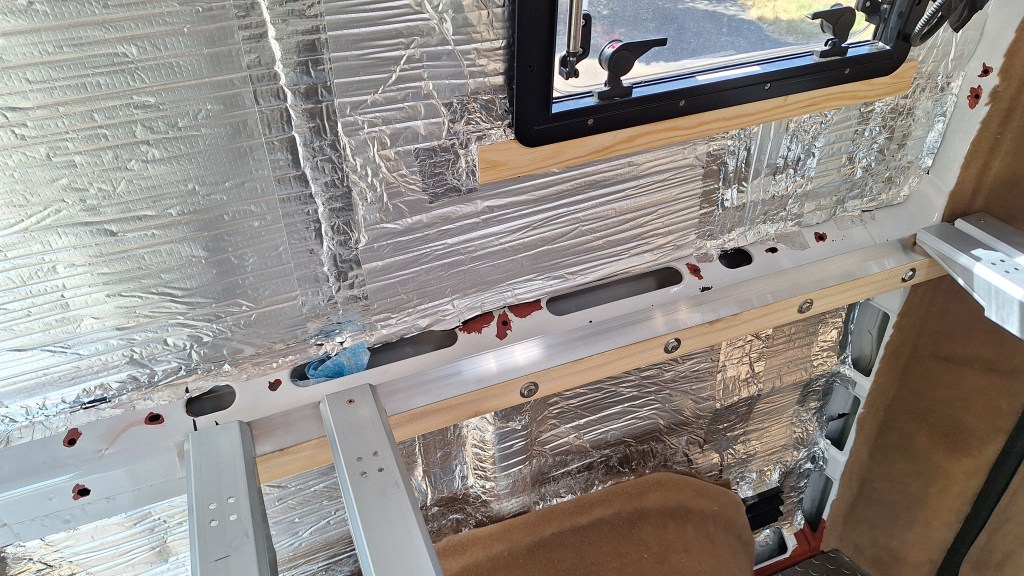
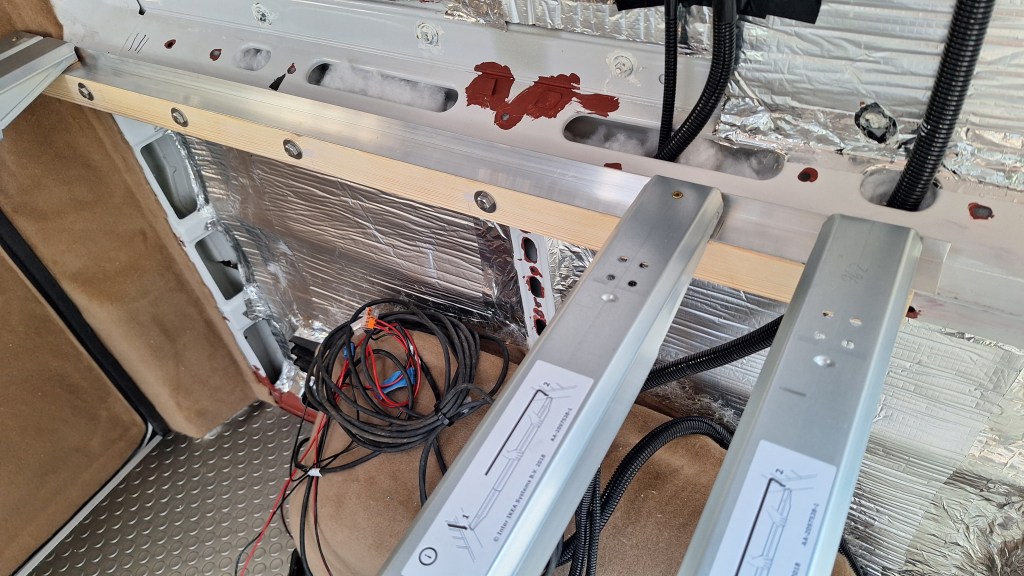
Fixed and Sliding Beams
The slats were then fixed to these, evenly spaced, initially with self-drilling countersunk screws (which will be replaced by stainless button-head socket screws and nuts).
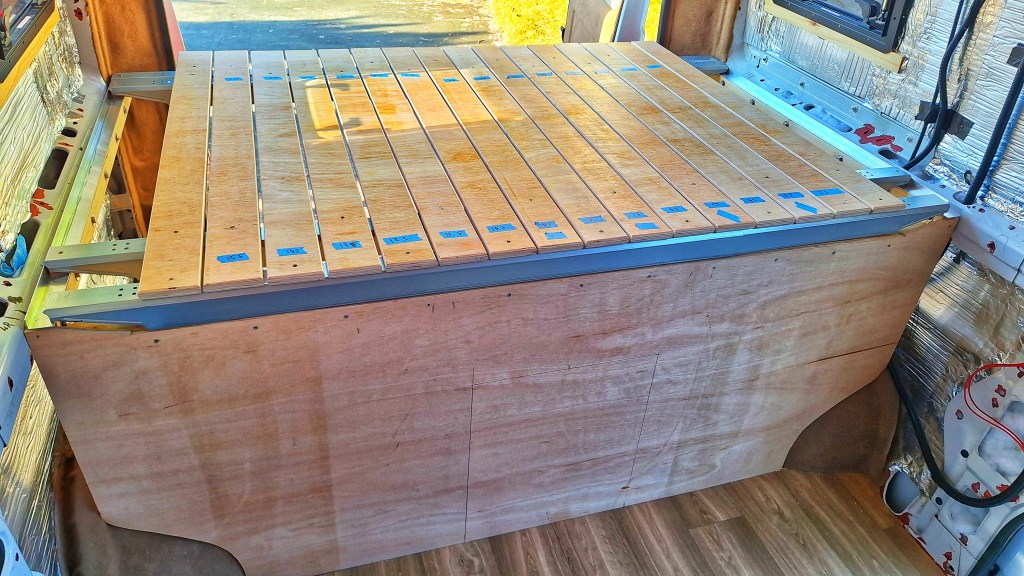
Slats Temporarily Installed
Next, the side infill panels were made to fill the gaps either side of the bed. These are scribed into the van’s rear pillars, and will eventually be covered in vinyl, and have a flexible stalk lamp, with USB outlets, fixed towards the rear, to act as bedside lamps and for charging phones or Kindles.
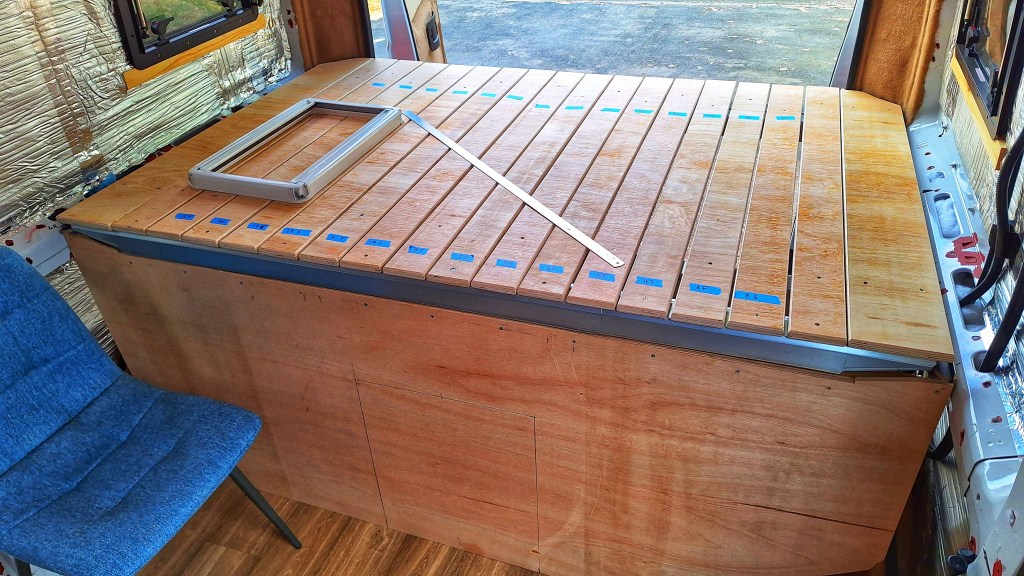
Side Infills/Shelves Affixed
The next step will be to pretty much disassemble the whole lot and cut out the front board for the fridge access door and the slide-out table. Those together will require a fair bit of 2×2 framing to secure the (pull out) chest fridge freezer, and permit securing the table’s slide hardware.
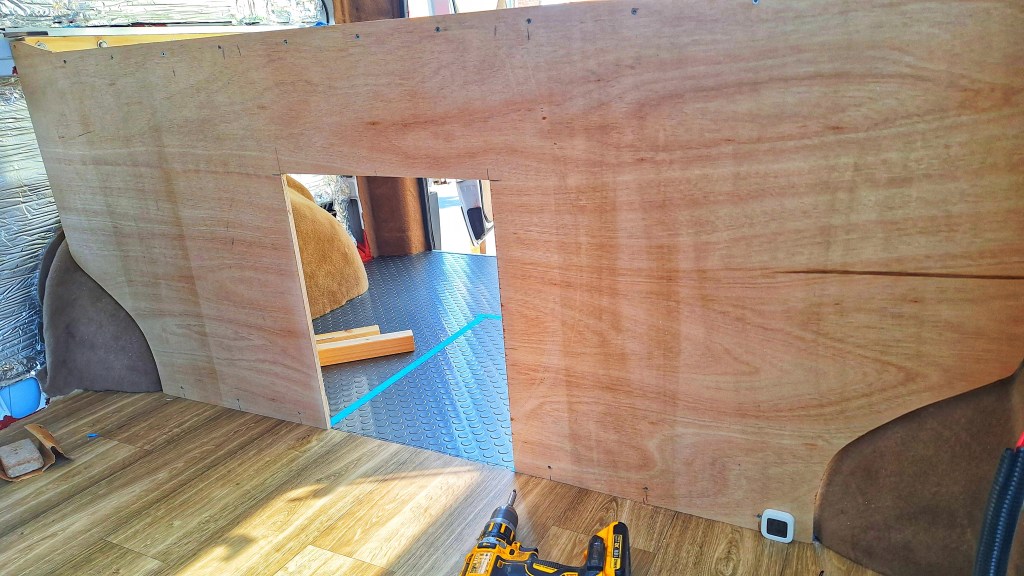
Cut – but may need to be slightly wider
I cut the board for the fridge/freezer opening, and it fits – maybe a little too well. It depends on what I decide on for a door, and it will need to be wider if I decide on an inset side-hinged one, or a ‘tambour’ roll-down one. The latter would be favourite as it would leave better access for the top-opening F/F. Price will be a consideration, though.
A tambour door kit was duly purchased (cheap enough as it happens) and side panels added to the front panel, to permit affixing the tambour ‘rollers’. Oh, and the fridge access cut-out was made a bit wider at the same time!
Most of the bed items were then stripped back out and placed in temporary storage, to make room for the nitty gritty of installing the electrics panel, battery, inverter, and so on.
The panel itself was scribed and cut to fit snugly around the n/s wheel housing, and cover the full wall space below the bed from the rear door to the bed front panel. Again, I used phenolic ply recycled from the old floor.
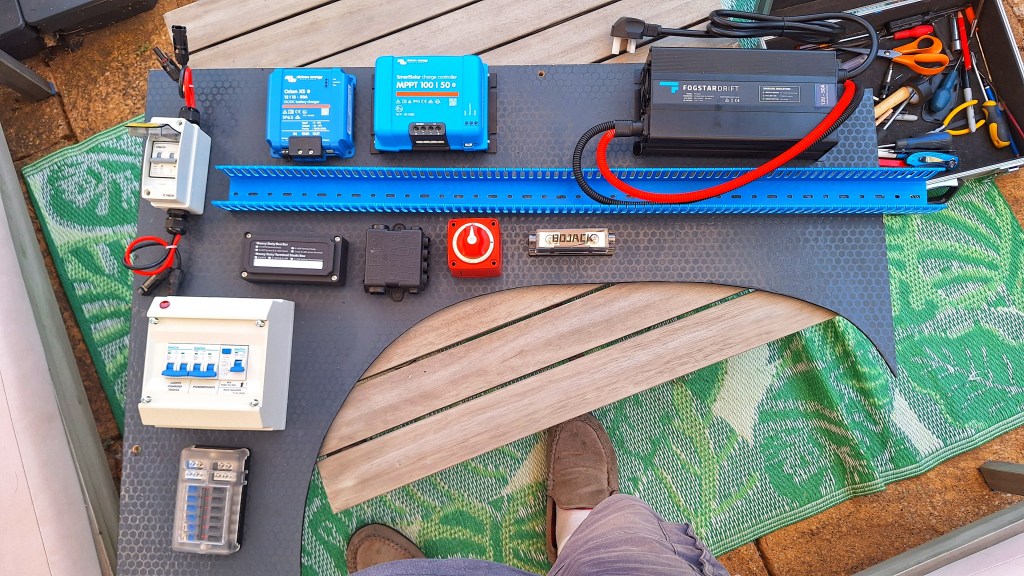
It won’t look like this arrangement of components, but it gives an idea of the side panel.
And, now, the next stage is properly assembling the electric panel(s). Which is the main subject of the next blog…
 ZigZag Wanderer
Leave a comment